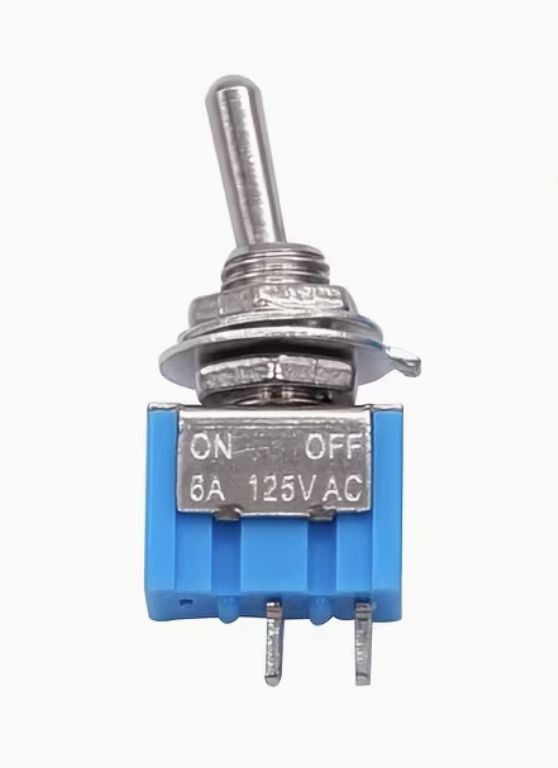
Mini Toggle Switch – 2-Pin SPST ON/OFF – 6A 125V / 3A 250V, Panel Mount
Share
R14.78
Buy and save
Buy and earn R0.08 Loyalty for your next purchase
Loyalty is a discount program that lets you buy products and earn points to redeem on your next purchase. Your Loyalty balance is updated when you pay online or in-store. The Loyalty amount shown on this page can be recalculated at the checkout.
In stock
1
Mini Toggle Switch – 2-Pin SPST ON/OFF – 6A 125V / 3A 250V, Panel Mount
Share
Product Details
Mini Toggle Switch – 2-Pin SPST ON/OFF – Technical Specifications:
| Switch Type | – Toggle Switch (Latching) |
| Configuration | – SPST (Single Pole Single Throw) |
| Positions | – 2 Position (ON / OFF) |
| Rated Current / Voltage (1) | – 6A @ 125V AC |
| Rated Current / Voltage (2) | – 3A @ 250V AC |
| Pin Count | – 2 Pins |
| Actuator Type | – Mini Metal Toggle Lever |
| Body Material | – Metal (Threaded Barrel) |
| Terminal Type | – Solder Lug |
| Mounting Type | – Panel Mount (Threaded Collar with Nut) |
| Panel Cutout Diameter | – 6mm |
| Contact Resistance | – ≤ 50mΩ |
| Insulation Resistance | – ≥ 100MΩ |
| Mechanical Life | – ≥ 10,000 Operations |
| Operating Temperature | – -25°C to +85°C |
| Applications | – DIY Electronics, Control Panels, Power Switches, Enclosures, Arduino / ESP32 Projects |
Handy Tips for Using the Mini SPST Toggle Switch:
1: This is a latching toggle switch — unlike a momentary push button, it stays in whichever position you leave it. Flick it to ON and it stays ON until you manually flick it to OFF. This makes it ideal for use as a power switch, mode selector, or enable/disable control in enclosures, control panels, and DIY electronics projects.
2: SPST (Single Pole Single Throw) means the switch has one input and one output — it simply opens or closes a single circuit. With only 2 pins there is no polarity to worry about — either pin can be the input or output. Wire it in series with the positive supply line of your circuit to act as a master power switch, or in series with any signal or load line you want to interrupt.
3: To mount the switch, drill or punch a 6mm hole in your panel or enclosure. Insert the switch barrel from the front, slide the washer over the thread from the rear, then thread on the locking nut and tighten firmly. Ensure the toggle lever is oriented in the correct direction before tightening — vertical (up/down) is the most common and intuitive orientation for ON/OFF switching.
4: When using this switch in a microcontroller project, wire it in series between your power supply and the VIN or 5V input of your board as a clean power on/off switch. Alternatively, wire it between a GPIO pin and GND with an internal pull-up resistor enabled — when the switch is ON it pulls the pin LOW, and when OFF the pin stays HIGH, giving your microcontroller a readable state signal.
5: Note that the voltage rating is 125V AC at 6A and 250V AC at 3A — the higher the voltage, the lower the maximum current the switch can safely carry. For DC circuits, always derate significantly from the AC ratings — as a general rule, use no more than 50% of the AC current rating for DC loads at equivalent voltages, as DC arcing at the contacts is more difficult to extinguish than AC arcing and causes faster contact wear.
Display prices in:ZAR